Introduction
Have you ever lost track of your ML experiments? Or maybe you’ve lost the hyperparameters and metrics from your best model? You’re not alone. Managing machine learning experiments can be challenging, especially when you’re working on multiple projects or collaborating with a team. That’s where MLflow comes in.
MLflow is an open-source platform for managing the end-to-end machine learning lifecycle. MLflow comes with four main features:
- Tracking: Record and query experiments to track metrics and parameters. It’s like Git for your ML code, so you can easily compare and reproduce your experiments.
- Projects: Package code into reproducible runs. It’s like Docker for your ML code, so you can easily share and run your projects.
- Models: Manage and deploy models from a variety of ML libraries. It’s like Docker Hub for your ML models, so you can easily deploy and serve your models.
- Registry: Store, annotate, discover, and manage models in a central repository. It’s like Docker Registry for your ML models, so you can easily version and share your models.
In this article, we’ll deploy MLflow with Docker to track and manage your ML experiments. But hey, why with Docker? Isn’t it easier to install MLflow with pip install mlflow? Well, deploying MLflow with Docker has several advantages:
- Isolation: You can run MLflow in a container without worrying about dependencies or conflicts with your local environment.
- Portability: You can easily share your MLflow environment with your team or deploy it to the cloud.
- Reproducibility: You can run the same MLflow environment on different machines without worrying about compatibility issues.
So, let’s get started!
TL;DR
We provide a GitHub repository with all the code and configurations needed to deploy MLflow with Docker. Please check the ruhyadi/mlflow-docker repository for more details.
Prerequisites
Before we begin, make sure you have the following prerequisites:
- Docker: Install Docker on your machine by following the instructions on the official Docker website.
- MLflow: Familiarize yourself with MLflow by reading the official MLflow documentation.
- Python: Basic knowledge of Python programming language. We’ll use Python to create MLflow experiments.
Setting Up The Services
We’ll use Docker Compose to set up the MLflow, Minio, and PostgreSQL services. Minio is an open-source object storage server compatible with Amazon S3. We’ll use Minio as the artifact store for MLflow. PostgreSQL is an open-source relational database management system. We’ll use PostgreSQL as the backend store for MLflow.
Step 1: Project Directory
Create a new directory for this project including the following files:
mlflow-docker/├── dockerfile.mlflow├── dockerfile.python├── docker-compose.yaml├── mlflow_experiment.py└── mlflow_pred.pyInside the mlflow-docker directory, initialize a new Git repository with the following commands:
cd mlflow-dockergit initStep 2: MLflow dockerfile
Create the dockerfile.mlflow file with the following content:
FROM ghcr.io/mlflow/mlflow:v2.19.0
RUN pip install --no-cache-dir \    boto3 \    psycopg2-binary
We’re using the official MLflow Docker image from the GitHub Container Registry. The dockerfile.mlflow file installs the boto3 and psycopg2-binary packages, which are required for MLflow to work with Amazon S3 (Minio) and PostgreSQL.
Step 3: Python dockerfile
Next, create the dockerfile.python file with the following content:
FROM python:3.10-slim
RUN pip install --no-cache-dir \    mlflow \    boto3 \    psycopg2-binary \    scikit-learn
We’ll use the dockerfile.python file to create a Python environment to run MLflow experiments.
Step 4: Docker Compose
Next, create the docker-compose.yaml file with the following content:
services:  mlflow-web:    build:      context: .      dockerfile: dockerfile.mlflow    ports:      - "${MLFLOW_PORT:-5000}:5000"    environment:      MLFLOW_S3_ENDPOINT_URL: "http://minio:9000"      MLFLOW_S3_IGNORE_TLS: "true"      AWS_ACCESS_KEY_ID: "mflow"      AWS_SECRET_ACCESS_KEY: "mflow123"    entrypoint: mlflow server --backend-store-uri postgresql+psycopg2://mlflow:mlflow123@postgres/mlflow --default-artifact-root s3://mlflow/ --artifacts-destination s3://mlflow/ -h 0.0.0.0    depends_on:      - minio      - postgres    networks:      - mlflow-network
  minio:    image: minio/minio:latest    ports:      - "${MINIO_PORT:-9000}:9000"      - "${MINIO_CONSOLE_PORT:-8900}:8900"    environment:      MINIO_ACCESS_KEY: "mlflow"      MINIO_SECRET_KEY: "mlflow123"    volumes:      - "mlflow-minio:/data/minio"    command: 'minio server /data/minio --console-address ":8900"'    networks:      - mlflow-network
  postgres:    image: postgres:16-alpine    ports:      - "${POSTGRES_PORT:-5432}:5432"    environment:      POSTGRES_USER: "mlflow"      POSTGRES_PASSWORD: "mlflow123"      POSTGRES_DB: "mlflow"    volumes:      - "mlflow-postgres:/var/lib/postgresql/data"    networks:      - mlflow-network
networks:  mlflow-network:    name: mlflow-network    driver: bridge
volumes:  mlflow-minio:    driver: local  mlflow-postgres:    driver: local
We’re using docker-compose to define the MLflow, Minio, and PostgreSQL services. The MLflow service is configured to use Minio as the artifact store and PostgreSQL as the backend store. We’re also exposing the MLflow web interface on port 5000.
Running The Services
With the project directory set up and the services defined in the docker-compose.yaml file, you can now run the MLflow, Minio, and PostgreSQL services using Docker Compose with the following command:
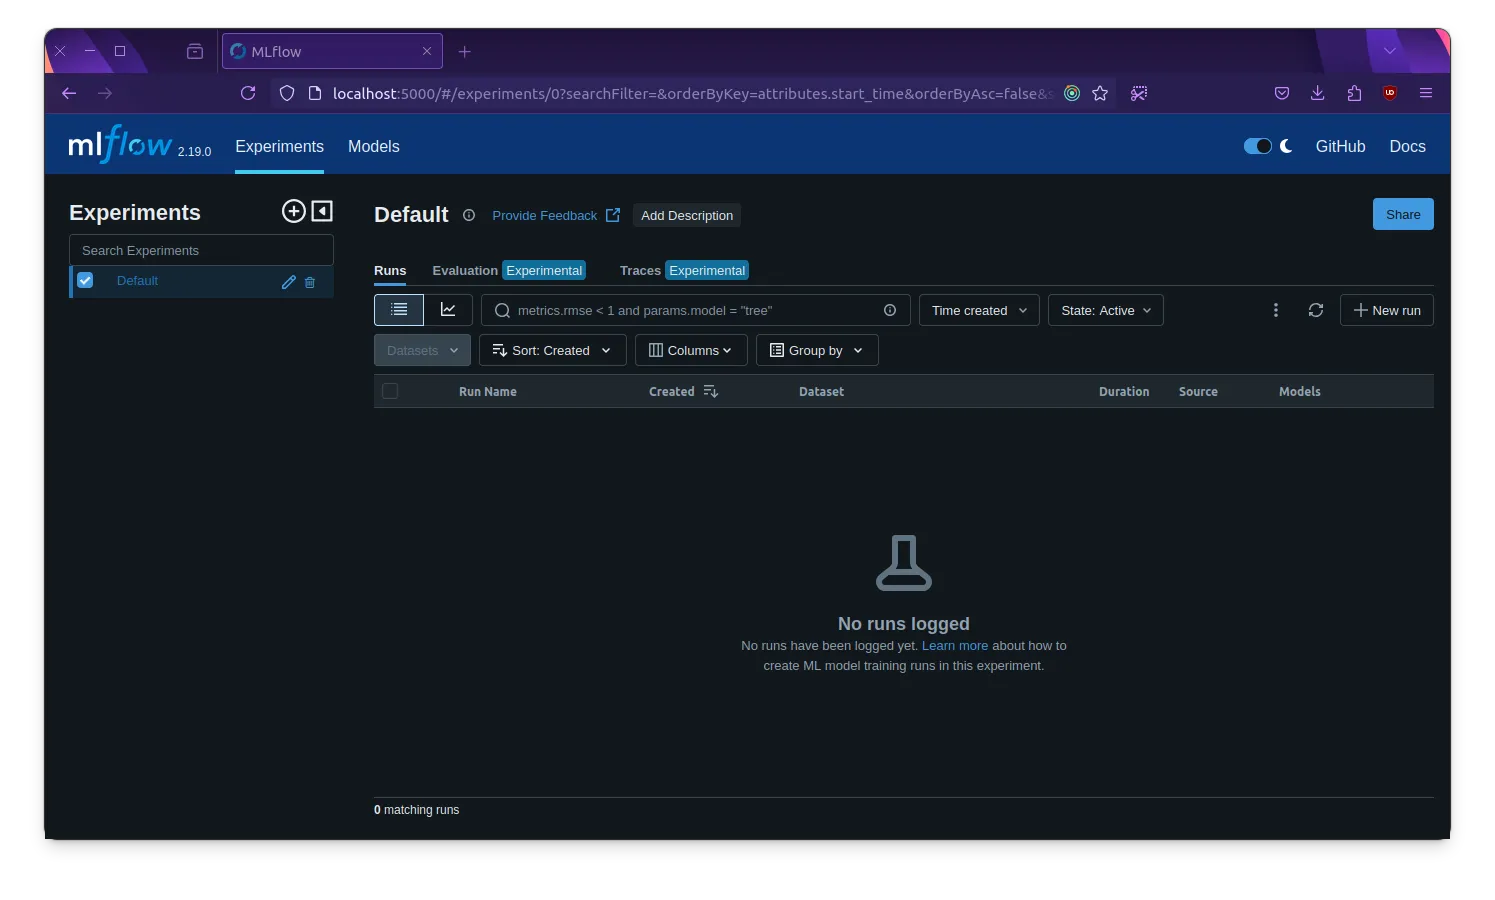
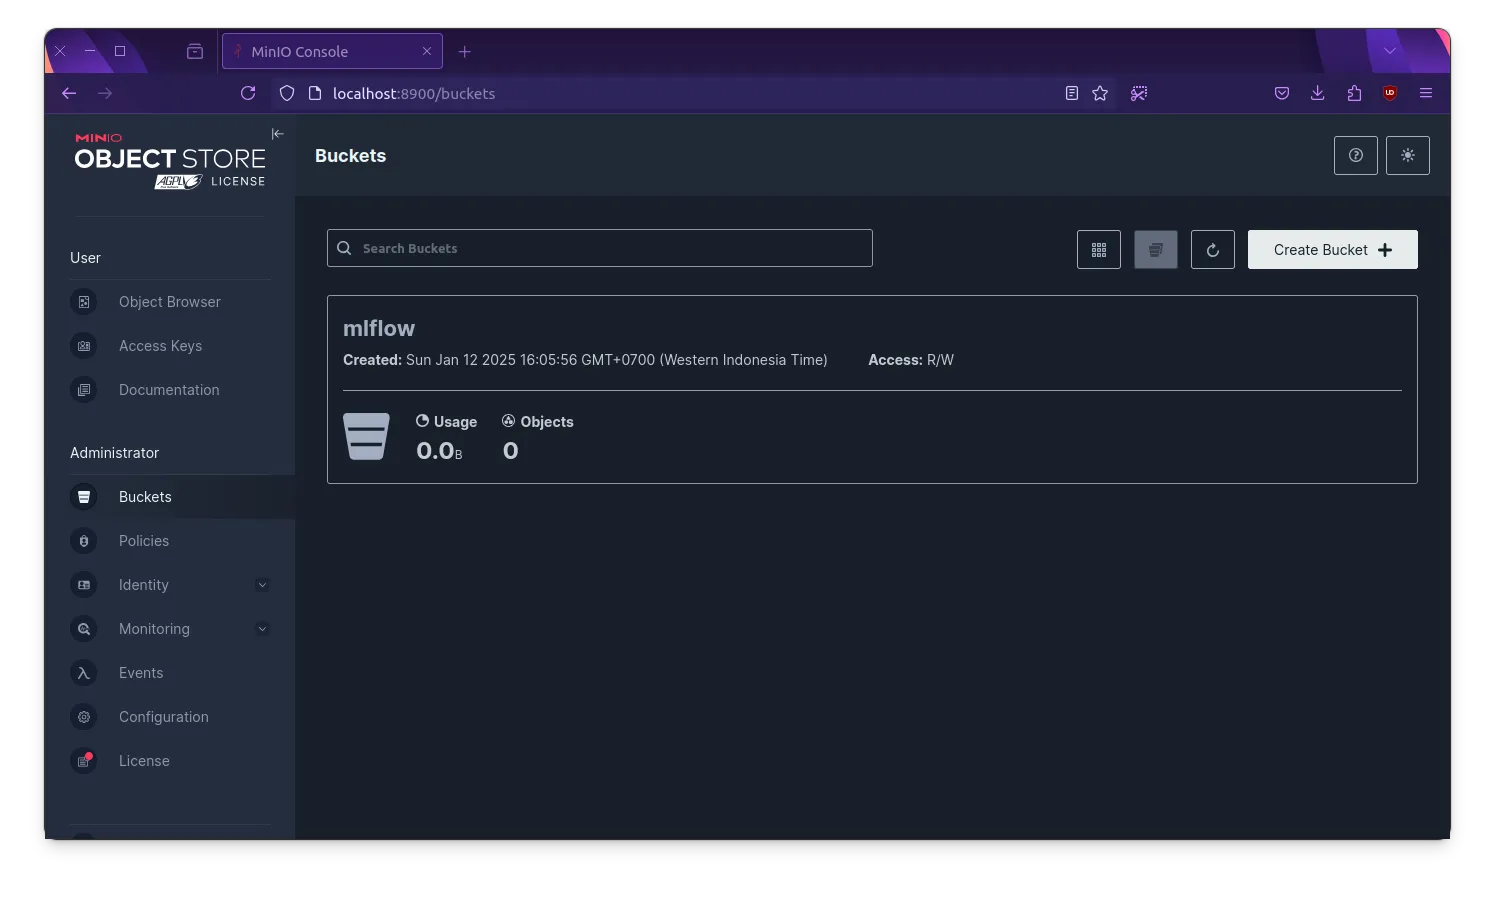
docker compose up -dThis command will build the MLflow Docker image, start the Minio and PostgreSQL services, and run the MLflow service. You can access the MLflow web interface at http://localhost:5000 and the Minio console at http://localhost:8900.
| MLflow Web Interface | Minio Console |
|---|---|
 |  |
Creating Minio Bucket
Because we’re using Minio as the artifact store, we need to create a bucket named mlflow in the Minio console. You can do this by logging into the Minio console with the access key mlflow and the secret key mlflow123 and creating a new bucket named mlflow.
Creating and Running MLflow Experiments
Now that the MLflow service is up and running, let’s create an MLflow experiment using Python. Create the mlflow_experiment.py file with the following content:
import mlflow
from sklearn.datasets import load_irisfrom sklearn.model_selection import train_test_splitfrom sklearn.ensemble import RandomForestClassifier
# set the MLflow tracking URImlflow.set_tracking_uri("http://mlflow-werb:5000")
# create an MLflow experimentexperiment_name = "iris-classification"mlflow.set_experiment(experiment_name)mlflow.autolog()
# load the iris datasetdb = load_iris()X_train, X_test, y_train, y_test = train_test_split(db.data, db.target, test_size=0.2, random_state=42)
# create and train a random forest classifierrf = RandomForestClassifier(n_estimators=100, random_state=42)rf.fit(X_train, y_train)
# predict on the test sety_pred = rf.predict(X_test)
This Python script creates an MLflow experiment named iris-classification, loads the Iris dataset, trains a random forest classifier, and predicts on the test set. The MLflow experiment logs the hyperparameters, metrics, and artifacts to the MLflow service running in the Docker container.
In order to run the MLflow experiment, we need to build the Python Docker image and run the Python script in the container. You can use the following command to build the Python Docker image:
docker build -t dockerfile.python -f dockerfile.python .And then run the Python script in the container using the following command:
docker run \ --rm -v $(pwd):/app -w /app \ --network mlflow-network \ --env AWS_ACCESS_KEY_ID=mlflow \ --env AWS_SECRET_ACCESS_KEY=mlflow123 \ --env MLFLOW_S3_ENDPOINT_URL=http://minio:9000 \ dockerfile.python python mlflow_experiment.pyThis command mounts the current directory as a volume in the Python container, sets the environment variables required for MLflow to connect to Minio, and runs the mlflow_experiment.py script in the container.
The output should look something like this:
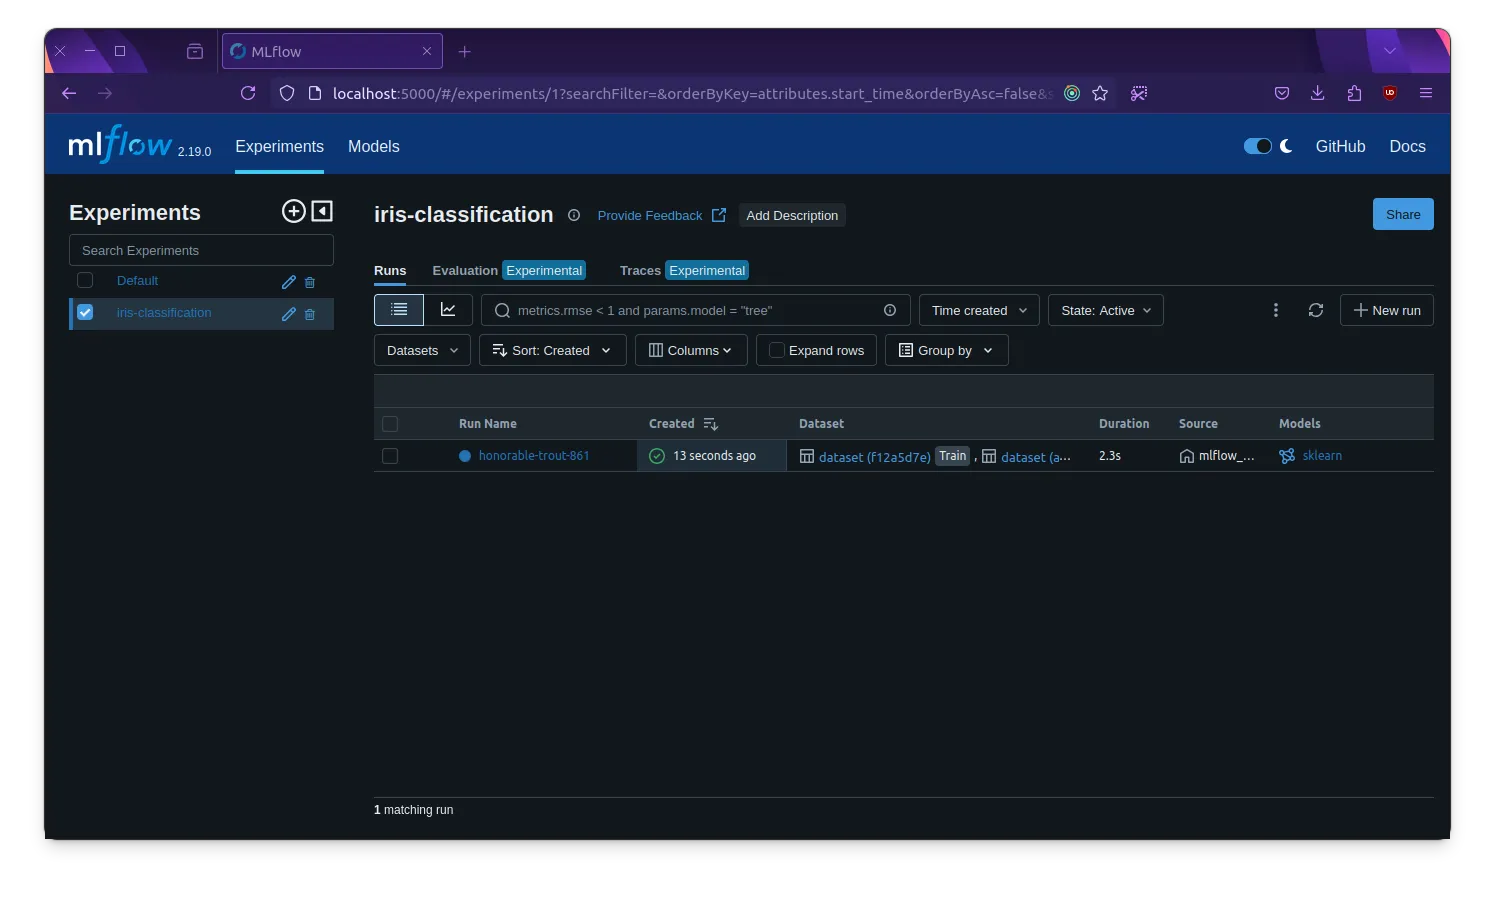
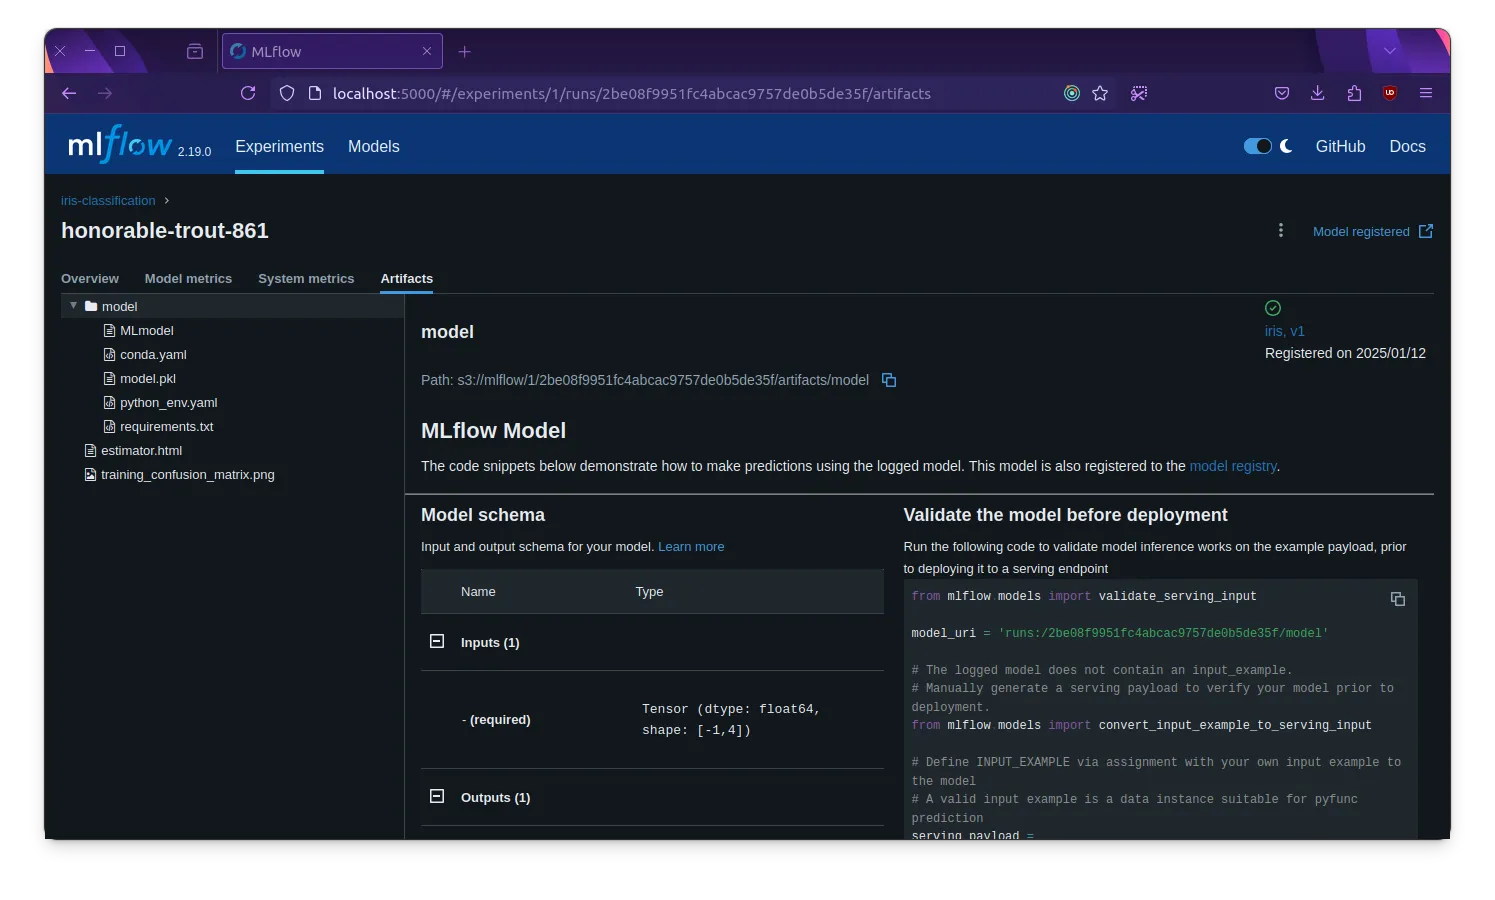
Starting experiment: iris-classificationLoading the iris datasetTraining a random forest classifier🏃 View run honorable-trout-861 at: http://mlflow-web:5000/#/experiments/1/runs/2be08f9951fc4abcac9757de0b5de35f🧪 View experiment at: http://mlflow-web:5000/#/experiments/1Predicting on the test setExperiment completeYou can view the MLflow experiment in the MLflow web interface at http://localhost:5000. The experiment should be named iris-classification and contain the hyperparameters, metrics, and artifacts logged by the Python script.
| MLflow Experiment | MLflow Artifact Store |
|---|---|
 |  |
Serving MLflow Models
Once you’ve trained and logged your MLflow models, you can serve them using the MLflow web interface. MLflow provides a REST API for serving models, but in this article, we’ll use python to invoke the model.
Create a new Python script named mlflow_pred.py with the following content:
import mlflowimport numpy as np
# set the MLflow tracking URImlflow.set_tracking_uri("http://mlflow-web:5000")
# load the modelmodel_uri = "models:/iris-classification/Production"model = mlflow.pyfunc.load_model(model_uri)
# create a sample inputsample_input = np.array([[5.1, 3.5, 1.4, 0.2]])
# predict using the modelprediction = model.predict(sample_input)
print(f"Sample Input: {sample_input}")print(f"Prediction: {prediction}")
This Python script loads the MLflow model named iris-classification from the Production stage, creates a sample input, and predicts using the model. You can run the Python script in the Python container using the following command:
docker run \ --rm -v $(pwd):/app -w /app \ --network mlflow-network \ --env AWS_ACCESS_KEY_ID=mlflow \ --env AWS_SECRET_ACCESS_KEY=mlflow123 \ --env MLFLOW_S3_ENDPOINT_URL=http://minio:9000 \ dockerfile.python python mlflow_pred.pyThe output should look something like this:
Sample Input: [[5.1 3.5 1.4 0.2]]Prediction: [0]The Python script should print the sample input and the prediction made by the MLflow model.
Conclusion
In this article, we explored how to use MLflow with Docker to track and manage your ML experiments. We set up the MLflow, Minio, and PostgreSQL services using Docker Compose, created an MLflow experiment using Python, and served the MLflow model using Python. By deploying MLflow with Docker, you can easily track, manage, and serve your ML experiments in an isolated, portable, and reproducible environment.